

Build a decision
Author a decision table — a set of rules that map inputs to outputs — then call it from a process. Decisions live under Build → Decisions and are reusable across processes.
Author the table
Section titled “Author the table”-
Create the model. Go to Build → Decisions → New Decision Model, give it a name and a key, and open the decision table in the editor.
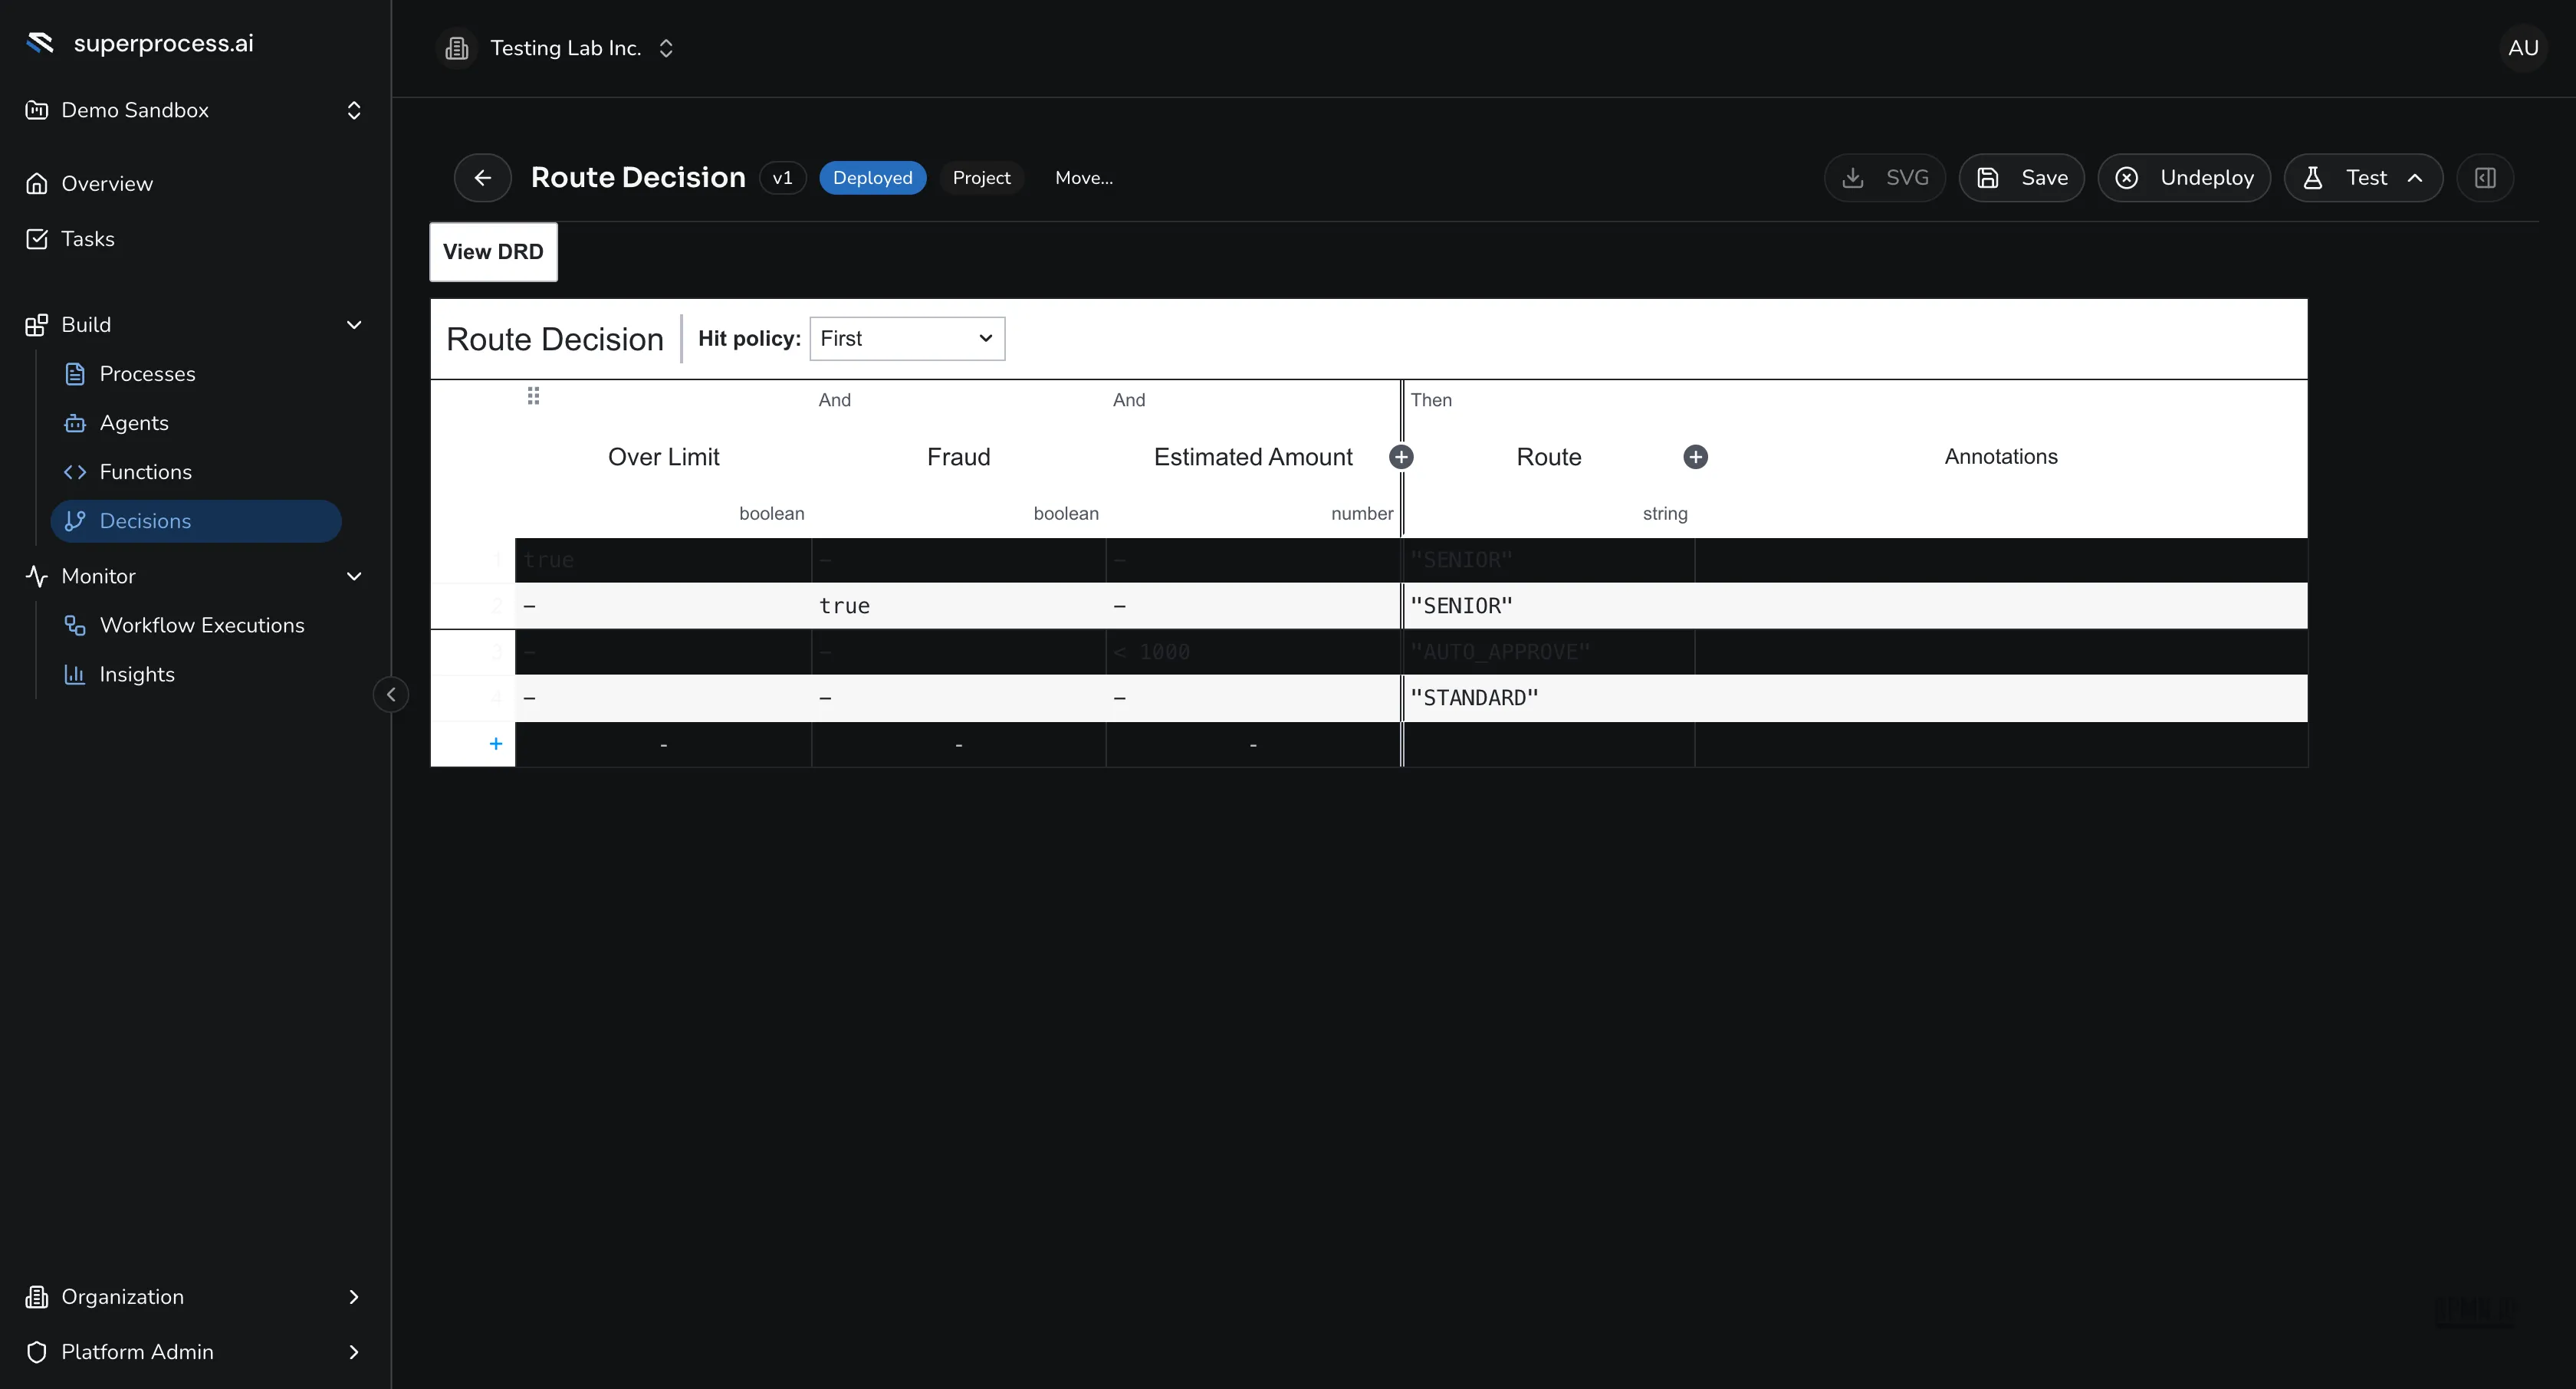
A decision table — inputs and an output across the top, one rule per row, and the hit policy up top. -
Set the hit policy. Choose what happens when several rules match — First, Unique, Any, Collect, or Rule order (see Decisions).
-
Add input columns. Each input is a condition column with a label and a type — string, number, or boolean (for example Over Limit as boolean, Estimated Amount as number).
-
Add output columns. The result columns the decision returns (for example Route as string).
-
Add rules (rows). Fill each input cell with a FEEL condition and each output cell with the result:
Cell Meaning -any — the cell is ignored < 1000,>= 25a comparison [18..65]a range low, mediuma list — matches any of them "SENIOR"a literal value (typically an output) A row matches when every input cell matches; the hit policy decides what to do when more than one does.
-
Test it. Use Test to run sample inputs through the table and confirm the outputs.
-
Deploy. Save, then Deploy the model so processes can invoke it.
Use it in a process
Section titled “Use it in a process”Add a Business Rule Task to a process, bind this decision, map the process variables to the table’s inputs, and write the result to an output variable — a downstream gateway can then branch on it.